I have converted a van for my Scooby Gang, but decided I needed some practise before attempting to paint it.
Read on for loads of advice on what NOT to do when painting vehicles...
My usual approach with vehicles for wargaming is to avoid them at all costs. The few times I've painted tanks etc. have not ended well. The results are passable from six feet away (with the curtains drawn and the lights out), but that's about it. Part of this is due to the fact that I brush painted the vehicles, and drybrushing in particular does not look good across large flat surfaces. I have used an airbrush on a couple of occasions, but not for a few years. The airbrush finish is much better than the brush one, however, so I intend to airbrush the van.
That being decided, I dug out my airbrushing supplies. My old compressor, while very good, is also very noisy. It hadn't been used in about four or five years and I was somewhat concerned about it blowing up, so I took the opportunity to buy a new one. It's a lot quieter, but I have had problems getting it to supply air reliably.
I airbrush in the kitchen, so a spray booth is very handy. Spray booths, however, were extremely expensive a few years ago, so I made do with a cardboard box (to try and catch the overspray) and the extractor fan in the wall. I picked up a cheaper, but perfectly functional, spray booth a little while ago, but this would be its first major trial.
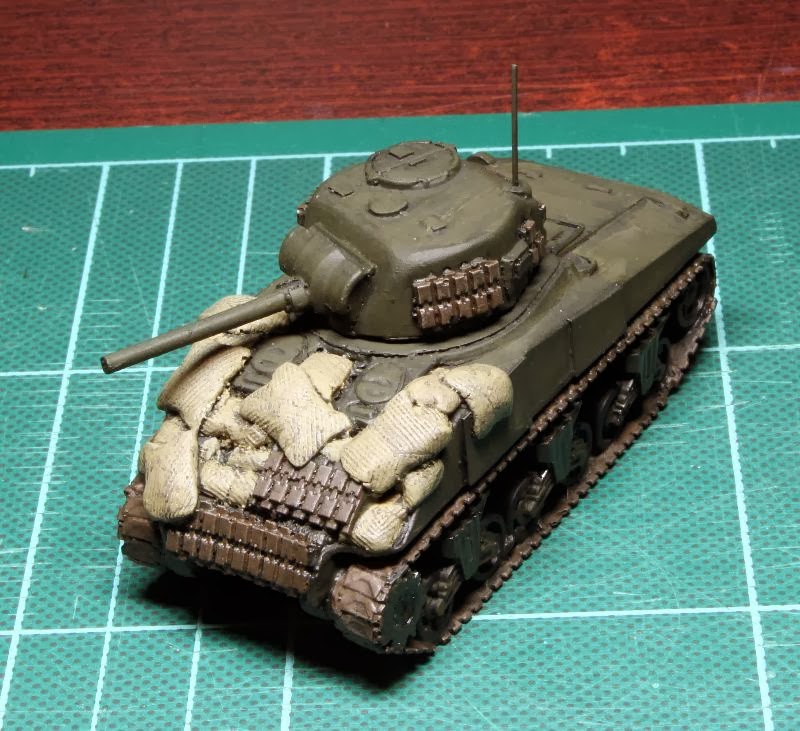
Sherman Tanks
The first victims for my new round of airbrushing enthusiasm were some 20mm Sherman Tanks. I have loads of these to paint, so this seemed like as good an opportunity as any.
The tanks were undercoated in black using a spray can.The base colour was Tamiya Olive Drab, thinned down with official Tamiya thinner. However, I was having major pressure problems with the compressor, and the air alternated between nothing and five second bursts that nearly blew me back off my chair. Eventually I got enough paint on the models and tidied everything up.
I wanted to apply decals to these models, but that didn't work too well either. The decals were a mix of commercial and ones I printed myself on my inkjet. The self-printed ones were bridge classification markings, as the only commercial ones I could find cost several arms and legs.
I used Microsol to pre-coat the area, but it leached all the colour from the classification markings (which were black on yellow), leaving black against olive drab. It was at this point that I decided that decals weren't really that important after all.
I had read an article about using Artists' Watercolour paints for washes, so I picked up some Mars Black to use for shading. The article mentioned using Acrylic Airbrush Medium (Golden in my case), rather than water. I have never used tube paints before, so my first attempt to create a wash was to put the paint into a dimple palette, add medium and stir. Nothing much happened, so I added a lot of water and eventually got something that resembled a wash.
I applied this to the model and left it to dry. When I checked, however, the medium had started to separate out and there were white pools of it in quite a few places. Some frantic scrubbing with a brush got rid of them, but the end result wasn't great.
At this point, I took the hint and decided to call the tanks done. They are okay - from six feet away, etc...
First Sherman is one I brush painted, including drybrushing.


Next two are airbrushed ones. I tried to do a highlight layer, but it looks rather streaky below
Sherman Firefly


Sherman

Ainsty Crawlers
Next up were a couple of Ainsty Crawlers. I had bought a new airbrush (an Iwata Revolution CR, top cup model), and this was its first outing.
I decided to undercoat using Vallejo primer, rather than spray primer. This claimed to be useable without thinning in an airbrush, but it dried on the tip, causing bubbling in the cup - not helped by continuing pressure problems with the compressor.
I used Tamiya J.A. Green for the base coat, thinned in a 1:2 ratio. This proved to be far too thin, and even after multiple passes, the recesses were still showing primer. Again, I had major pressure problems, so I took the opportunity that evening to work out what was going on with the pressure gauge, and it has behaved itself since.
I ended up brush painting the crawlers, both to get the recesses and even out the paintjob. For shading, I brushed on a wash of dark green, followed by Tamiya Smoke, but neither did much, and the Smoke left tide marks on the model. When I did a wash with the base colour - to try and remove the tide marks - it dried funny, leaving green splotches all over the place.
Accepting defeat, I used my other airbrush (a Paasche VL) to redo the base coat, using paint that had a lot less thinner in it. This worked, but left the model very flat. For shadows, I tried the Burnt Umber Watercolour again. However, rather than making a wash, I wet an area on the model, dabbed some paint into it and tried to blend it out. This took a long time, but looks okay. There were two Crawlers, so I used the same approach on the second one, this time with dark green watercolour paint for shading.
During all this I was watching the Miniature Mentor Weathering video by Rick Lawler. Having seen that I was doing pretty much everything wrong, I finished up the Crawlers by painting the windscreen, lights and the wheels. I didn't risk highlighting them, given the various problems I'd had. Again, nothing to write home about, but they will be perfectly functional models on the tabletop.


Having learned a few lessons, and with some semblance of a plan, I selected my next model. Its fate will be revealed in my next post. Spoiler alter - things didn't go according to plan.
No comments:
Post a Comment